SDKs
iOS - Push Notifications
Overview
DataSenses allows you to send push notifications to your applications from our dashboard. Please follow the steps to send your first push notification to your application. Please note to test remote push notifications you need to connect your actual iOS device. The remote push notifications don't work on simulator.
Configure Push Notifications with DataSenses
Installation
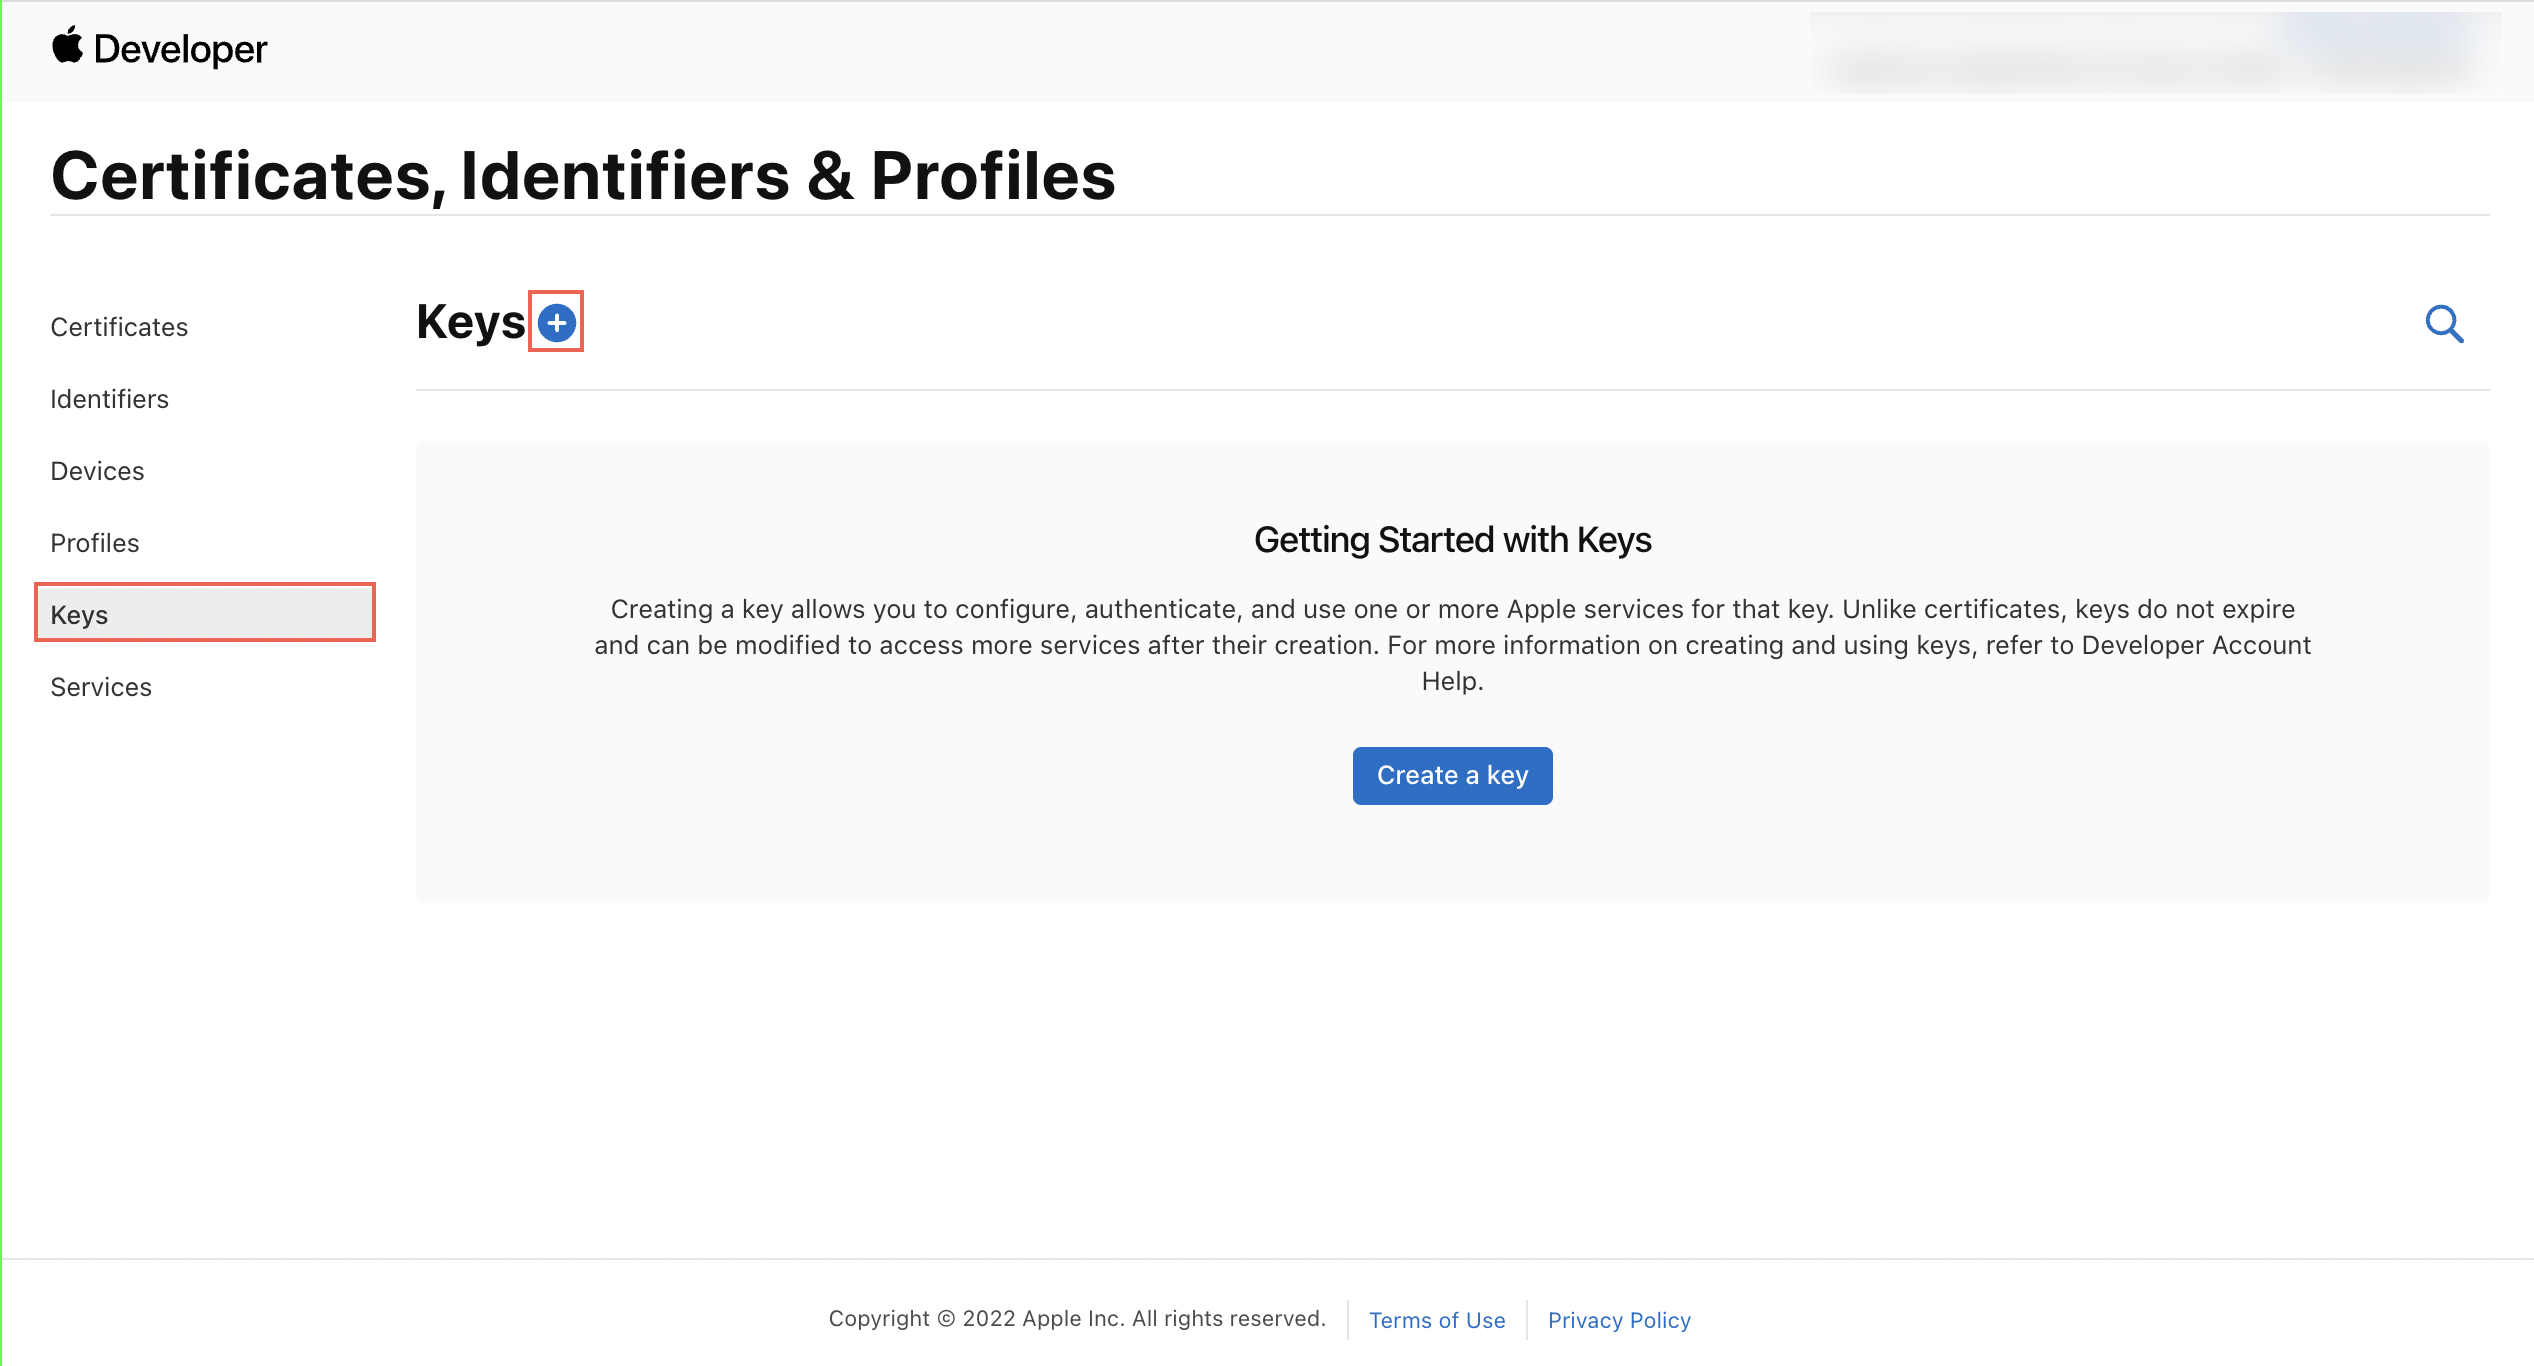
- Go to Apple developer account and go to Certificates, Identifiers & Profiles
- Go to Keys section and click on a new key using Add button(+).
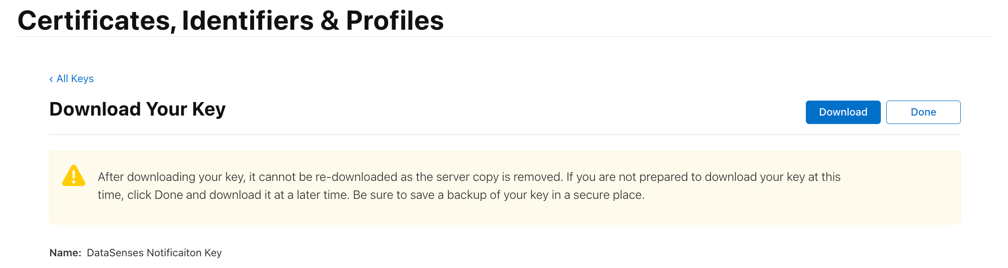
- Download keys and upload to DataSenses (.p8 is recommended) with Key ID and Team ID (You will get your Team ID from Apple Developer Account. Go to Membership tab and get your Team ID)

Upload to DataSenses' Dashboard 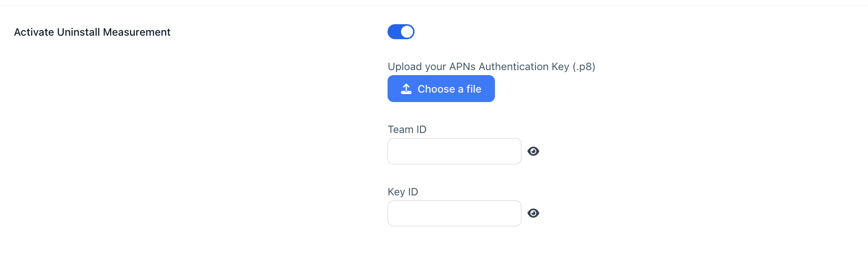
Share firebase notification token to DataSenses
The following code is an example of how to send the notification token to DataSenses
- Add Push Notification in Signing & Capabilities in Xcode. Below is an example how to implement your owned notification system and share the token to DataSenses.
import FirebaseMessaging

func initializeFirebase() {
     FirebaseApp.configure()
 }

func application(_ application: UIApplication, didFinishLaunchingWithOptions launchOptions: [UIApplication.LaunchOptionsKey: Any]? = nil) -> Bool {
        initializeFirebase() // Must have, if you already integrated with firebase, don't need this function
        Messaging.messaging().delegate = self
        UNUserNotificationCenter.current().delegate = self

        UNUserNotificationCenter.current().requestAuthorization(options: [.alert, .sound, .badge]) { success, _ in
            guard success else {
                return
            }
            print("Success in APNS")

        }
        application.registerForRemoteNotifications()

        return status
    }

    func application(_ application: UIApplication, didRegisterForRemoteNotificationsWithDeviceToken deviceToken: Data) {
        Messaging.messaging().apnsToken = deviceToken
    }

    func messaging(_ messaging: Messaging, didReceiveRegistrationToken fcmToken: String?) {
        var formattedAPNSToken = ""
        if let apnsTokenData = Messaging.messaging().apnsToken {
            formattedAPNSToken = apnsTokenData.map { String(format: "%02.2hhx", $0) }.joined()
            print("APNs token: \(formattedAPNSToken)")
        }

        print("FCM token: \(fcmToken ?? "")")

        Datasenses.shared().registerPushNotification(token: fcmToken, apnToken: formattedAPNSToken)
    }
If your team is using Firebase as your messaging system. Please read the following
Configuration
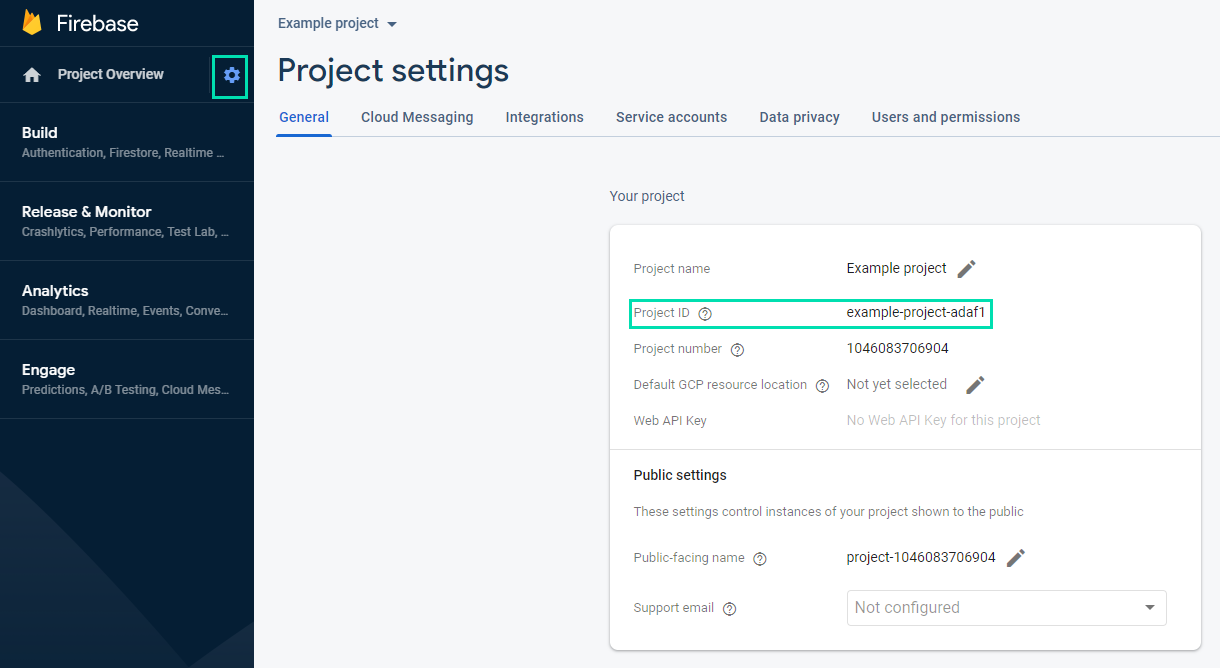
Go to the FCM console. then go to Project Overview -> Project settings
Copy the Project ID. You will need it at a later stage in the process.
Go to the Cloud Messaging tab. Make sure that Firebase Cloud Messaging API (V1) is set to Enabled
To assign DataSenses the uninstall role:
- Go to the Service accounts tab
- Click Manage service account permissions. A new browser tab opens in Google Cloud Platform
- In the side menu, select Roles.
Complete as follows:
- Title: Enter DataSenses uninstalls.
- ID: Enter ds_uninstalls.
- Role launch stage: Select General availability.
Click Add Permissions
In Filter, Select the cloudmessaging.messages.create permission
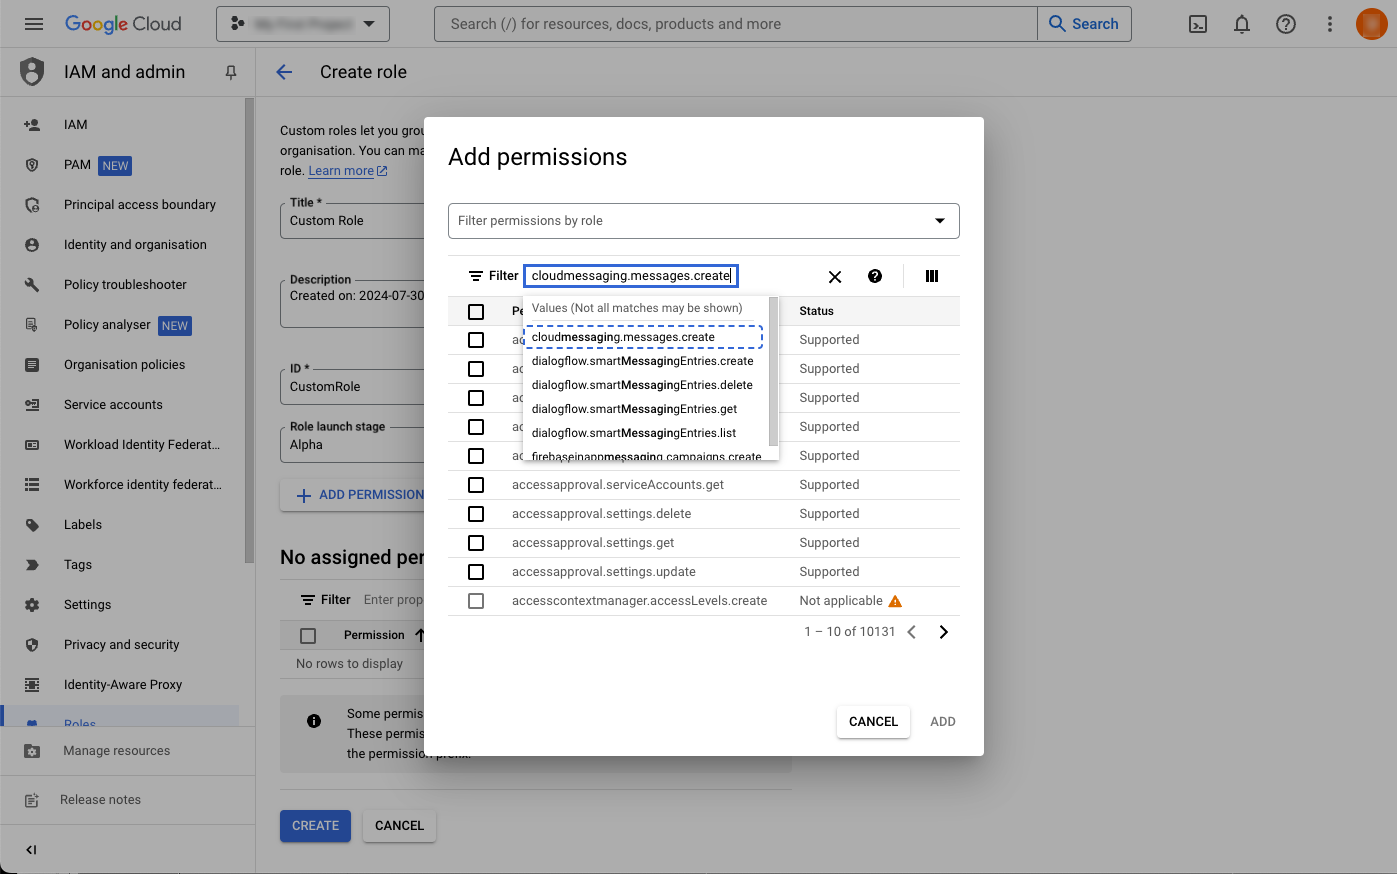
Click Add and then click Create
To assign DataSenses the FCM uninstall role:
- In the side menu, select IAM
- Open the PERMISSIONS -> VIEW BY PRINCIPALS tab
- Click Grant Access
- In Add Principals -> New principals, enter ds-uninstall-tracking@ds-uninstall-tracking.iam.gserviceaccount.com
- In Assign roles -> Role select the custom you created -> DataSenses uninstalls
- Click Save.